Pytorch入门实战(8):小样本学习实现图片分类(Few-shot Learning, Meta Learning)
源代码地址: https://github.com/iioSnail/pytorch_deep_learning_examples
本文内容涉及知识点
本文内容
本文会使用Omniglot数据集训练一个孪生网络(相似网络),其可以用来判断两个图片的相似程度,通过该方式来实现小样本学习。
本文使用Omniglot的训练集来训练神经网络,使用其验证集来构造Support Set。本文会从验证集的每个类别中拿出5个样本作为Support Set,一共挑选10个类别,即为10-way 5-shot的小样本学习。
环境配置
本文所使用到的环境如下:
```
python==3.8.5
torch==1.10.2
torchvision==0.11.3
numpy==1.22.3
matplotlib==3.2.2
```
导入本文需要使用到的包:
```python
import random

import torch
import torchvision
from torch import nn
from torchvision import transforms

import numpy as np
import matplotlib.pyplot as plt

from tqdm import tqdm
```
```python
device = torch.device('cuda' if torch.cuda.is_available() else 'cpu')
print("Device:", device)
```
```
Device: cuda
```
加载数据集
我们这里使用Pytorch提供的torchvision.datasets.Omniglot的方法来加载数据集。
如果你用pytorch下载失败,可以使用百度网盘链接下载,然后解压到当前文件夹下,将
download参数改为False即可
```python
train_dataset = torchvision.datasets.Omniglot('./dataset', background=True, transform=transforms.ToTensor(), download=True)
validation_dataset = torchvision.datasets.Omniglot('./dataset', background=False, transform=transforms.ToTensor(), download=True)
```
成功加载完数据集后我们来简单看一下:
```python
image, target = train_dataset.__getitem__(0)
print("image size:", image.size())
print("target:", target)
```
```
image size: torch.Size([1, 105, 105])
target: 0
```
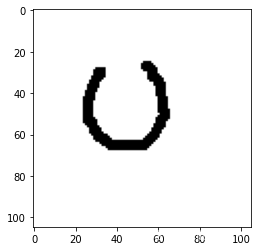
Omniglot数据集都是一张一张的灰度图,和MNIST手写数据集差不多。这个target就是用数字表示的类别,我也不知道对应成实际类别是什么,也不需要知道。
我们来简单绘制一张看一下:
```python
plt.imshow(image.squeeze(), cmap='gray')
```

数据处理
在孪生网络中,我们一次给到模型的是一对儿图片,然后让模型来区分这对儿图片是否是相同的类别。我们本章就需要来定义这么一个函数,来生成一批样本对儿,其中一半图片对儿是相同类别,另一半图片对儿是不同类别。
我们首先获取一下训练集中的所有target和所有labels:
```python
all_targets = np.array([train_dataset.__getitem__(i)[1] for i in range(len(train_dataset))])
all_labels = np.array(list(set(all_targets)))
```
```python
print("all_targets:", all_targets)
print("all_labels:", all_labels)
```
```
all_targets: [  0   0   0 ... 963 963 963]
all_labels: [  0   1   2 ... 959 960 961 962 963]
```
准备好了这两个基础数据,我们就可以来构造我们的Sample函数了。其作用就是返回一个batch的图片对儿,其中一半是相同的类别,称为正样本,另一半是不同的类别,称为负样本。
```python
def sample_batch(batch_size):
    """
    从train_dataset中sample一些数据对。一半正样本,一半负样本
    """

    # 选取二分之一个batch的labels作为正样本,这样就完成了正样本的构造。
    positive_labels = np.random.choice(all_labels, batch_size // 2)
    # 针对这些labels,每个选取两张相同类别的图片
    batch = []
    for label in positive_labels:
        labels_indexes = np.argwhere(all_targets == label)
        pair = np.random.choice(labels_indexes.flatten(), 2)
        batch.append((pair[0], pair[1], 1)) # 图片类别相同,所以target为1

    # 选取负样本,这次选取一个batch的labels,然后每个labels个选取一张图片。这样就完成了负样本的构造。
    negative_labels = np.random.choice(all_labels, batch_size)
    for sample1, sample2 in negative_labels.reshape(-1, 2):
        sample1 = np.random.choice(np.argwhere(all_targets == sample1).flatten(), 1)
        sample2 = np.random.choice(np.argwhere(all_targets == sample2).flatten(), 1)
        batch.append((sample1.item(), sample2.item(), 0)) # 图片类别不相同,所以target为0

    """
    完成上面的动作后,最终得到的batch如下:
        (734, 736, 1),
        (127, 132, 1),
        ...
        (859, 173, 0),
        ...
    其中前两个表示样本对对应在dataset中的index,1表示前两个样本是相同类别。0表示这两个样本为不同类别。
    接下来需要对其进行shuffle处理,然后从dataset中获取到对应数据,最终组成batch.
    """
    random.shuffle(batch)

    sample1_list = []
    sample2_list = []
    target_list = []
    for sample1, sample2, target in batch:
        sample1_list.append(train_dataset.__getitem__(sample1)[0])
        sample2_list.append(train_dataset.__getitem__(sample2)[0])
        target_list.append(target)
    sample1 = torch.stack(sample1_list)
    sample2 = torch.stack(sample2_list)
    targets = torch.LongTensor(target_list)
    return sample1, sample2, targets
```
完成sample函数后,我们来简单试一下:
```python
sample1, sample2, targets = sample_batch(16)
```
```python
print("sample1:", sample1.size())
print("sample2:", sample1.size())
print("targets:", targets)
```
```
sample1: torch.Size([16, 1, 105, 105])
sample2: torch.Size([16, 1, 105, 105])
targets: tensor([1, 1, 0, 0, 1, 0, 1, 1, 1, 0, 1, 0, 0, 0, 0, 1])
```
其中sample1[0]和smaple2[0] 是一对儿,targets[0]是它们的标签,表示它们是否是相同类别。
准备好数据后,我们接下来开始构建模型:
模型构建
我们需要构建的模型也很简单,模型的功能就是输入两张图片,输出这两张图片是否为同一个类别。由于是二分类问题,所以我们最后的值通过Sigmoid处理一下:
```python
class SimilarityModel(nn.Module):

    def __init__(self):
        super(SimilarityModel, self).__init__()

        # 定义一个卷积层,用于特征提取。
        self.conv = nn.Sequential(
            nn.Conv2d(1, 4, kernel_size=3),
            nn.ReLU(),
            nn.MaxPool2d(kernel_size=2, stride=2),
            nn.Conv2d(4, 16, kernel_size=3),
            nn.ReLU(),
            nn.MaxPool2d(kernel_size=2, stride=2),
            nn.Conv2d(16, 32, kernel_size=3),
            nn.ReLU(),
            nn.MaxPool2d(kernel_size=2, stride=2),
            nn.Conv2d(32, 32, kernel_size=3),
            nn.ReLU(),
        )

        # 定义一个线性层,用来判断两张图片是否为同一类别
        self.sim = nn.Sequential(
            nn.Flatten(),
            nn.Linear(2592, 256),
            nn.ReLU(),
            nn.Linear(256, 1),
            nn.Sigmoid()
        )

    def forward(self, sample1, sample2):
        # 使用卷积层提取sample1的特征
        sample1_features = self.conv(sample1)
        # 使用卷积层提取sample2的特征
        sample2_features = self.conv(sample2)
        # 将 |sample1-sample2| 的结果送给线性层,判断它们的相似度。
        return self.sim(torch.abs(sample1_features - sample2_features))
```
```python
model = SimilarityModel()
model = model.to(device)
```
模型定义完后,我们来简单的尝试一下:
```python
model(sample1.to(device), sample2.to(device))
```
```
tensor([[0.5004],
        [0.5005],
        [0.5003],
        [0.5005],
        [0.5000],
        ...
        [0.5002],
        [0.5003],
        [0.5000],
        [0.5002]], device='cuda:0', grad_fn=)
```
可以看到,由于模型还未训练,所以输出的值都在50%左右。
训练模型
接下来开始训练模型,和普通的二分类问题差别不算很大。
```python
model = model.train()
```
```python
criteria = nn.BCELoss()
optimizer = torch.optim.Adam(model.parameters(), lr=1e-4)
```
```python
batch_size = 512
# 如果500次迭代loss都没有下降,那么就停止训练
early_stop = 1500
# 记录最小的一次loss值
min_loss = 100.
# 记录下上一次最小的loss是哪一次
last_episode = 0
# 无线更新参数,直到loss不再下降为止
for episode in range(100000):
    # 使用sample_batch函数sample出一组数据,包含一半正样本,一半负样本
    sample1, sample2, targets = sample_batch(batch_size)
    # 将数据送入模型,判断是否为同一类别
    outputs = model(sample1.to(device), sample2.to(device))
    # 将模型的结果丢给BCELoss计算损失
    loss = criteria(outputs.flatten(), targets.to(device).float())
    loss.backward()
    # 更新模型参数
    optimizer.step()
    optimizer.zero_grad()

    # 如果本次损失比之前的小,那么记录一下
    if loss < min_loss:
        min_loss = loss.item()
        last_episode = episode
        torch.save(model, 'best_model.pt')

    # 如果连续{early_stop}次loss都没有减小,那么就停止训练
    if episode - last_episode > early_stop:
        break

    # 每50个episode打印一下日志
    if episode % 50 ==  0:
        print(f"episode {episode}, loss {loss}")

print("Finish Training.")
```
```
episode 0, loss 0.6931208372116089
episode 50, loss 0.6730687618255615
episode 100, loss 0.6514454483985901
episode 150, loss 0.6112750768661499
...
episode 2600, loss 0.22310321033000946
episode 2650, loss 0.24409082531929016
episode 2700, loss 0.3104301393032074
```
模型验证
验证前先加载一下之前最好的模型:
```python
model = torch.load('best_model.pt')
model = model.to(device)
```
接下来我们来验证下我们模型的表现。我们使用上面构造好的validation_dataset。在validation_dataset中,全都是模型之间没有见过的类别,可不是没有见过的图片哦,连这个类别它都没有见过。不信你可以到dataset/images_evaluation这个目录下表看看那。
我们先来看下验证集中的类别情况:
```python
all_targets = np.array([validation_dataset.__getitem__(i)[1] for i in range(len(validation_dataset))])
all_labels = np.array(list(set(all_targets)))
```
```python
print("sample size:", len(all_targets))
print("all_targets:", all_targets)
print("all_labels:", all_labels)
```
```
sample size: 13180
all_targets: [  0   0   0 ... 658 658 658]
all_labels: [  0   1   2   3  ... 655 656 657 658]
```
可以看到,在验证集中我们一共有13180个数据,有658个类别,每个类别有20个样本。我们为每个类别选取5个样本作为support set供模型参考,剩下的15个作为验证集来验证模型的表现。
如果对这658个类别全部都做预测的话,相当于我们的任务是一个658-way 5-shot的任务。这样不仅预测过程会非常慢,并且准确率也会非常低,所以上面的简单模型就应付不了了。为了简单期间,我们这里裁剪一下,就使用10个类别来验证我们的模型:
```python
all_targets = all_targets[all_targets < 10]
all_labels = all_labels[:10]
print("sample size:", len(all_targets))
print("all_targets:", all_targets)
print("all_labels:", all_labels)
```
```
sample size: 200
all_targets: [0 0 0 0 0 0 0 0 .... 9 9 9 9 9 9]
all_labels: [0 1 2 3 4 5 6 7 8 9]
```
```python
support_set = []
validation_set = []
# 遍历所有的标签,每个标签选取前5个作为support set,后面的作为验证数据
for label in all_labels:
    label_indexes = np.argwhere(all_targets == label)
    support_set.append((label_indexes[:5].flatten().tolist()))
    validation_set += label_indexes[5:].flatten().tolist()
```
```python
print("support set:", support_set[:5])
print("validation set:", validation_set[:5])
print("validation size:", len(validation_set))
```
```
support set: [[0, 1, 2, 3, 4], [20, 21, 22, 23, 24], [40, 41, 42, 43, 44], [60, 61, 62, 63, 64], [80, 81, 82, 83, 84]]
validation set: [5, 6, 7, 8, 9]
validation size: 150
```
我们接下来需要定义一个预测函数,其给定一个图片,输出该图片的target。该函数的思路为:让该图片与support set里的所有类别都比较一下,看看与谁的相似度最高,那么该图片就是什么类别。由于一个类别有5张图片,我们可以通过取平均的方式来得到该图片为该类别的可能性。
```python
def predict(image):
    sim_list = [] # 存储image与每个类别的相似度
    # 一个类别一个类别的遍历,indexes存储的就是当前类别的5张图片的index
    for indexes in support_set:
        # 去validation_dataset中找出index对应的图片tensor
        tensor_list = []
        for i in indexes:
            tensor_list.append(validation_dataset[i][0])
        support_tensor = torch.stack(tensor_list)
        # 拿到该类别的5个图片后,就可以送给模型求image与它们的相似程度了,最后求个平均
        sim = model(image.repeat(5, 1, 1, 1).to(device), support_tensor.to(device)).mean()
        sim_list.append(sim)

    # 找出其中相似程度最高的那个,它就是预测结果
    result_index = torch.stack(sim_list).argmax().item()
    return all_labels[result_index]
```
我们来试下predict函数:
```python
predict(validation_dataset.__getitem__(validation_set[0])[0])
```
```
0
```
最后我们一个个的对验证集的数据进行验证,计算正确率。
```python
total = 0
total_correct = 0

# 由于验证集太大,为了更快的看到效果,我们验证前,将validation_set打乱一下再验证
random.shuffle(validation_set)
progress = tqdm(validation_set)

for i in progress:
    image, label = validation_dataset.__getitem__(i)
    predict_label = predict(image)

    total += 1
    if predict_label == label:
        total_correct += 1

    progress.set_postfix({
            "accuracy": str("%.3f" % (total_correct / total))
        })
```
```
100%|██████████| 150/150 [00:06<00:00, 21.66it/s, accuracy=0.700]
```
```python
print("Accuracy:", total_correct / total)
```
```
Accuracy: 0.7
```
最终,在这150个验证数据中,我们取得了70%的正确率,不算太高,但至少能说明模型是有效果的。
由于模型结构是我拍脑袋随便想的,而且比较小,所以如果用全部的658个类别做预测的话,效果会比较差,正确率大概只有15%左右,感兴趣的朋友可以尝试一下,并且优化模型。


