PyTorch Applications (1) - Video Face Mosaic Processing with YOLO
Introduction
YoloV11 (Github) offers a user-friendly API that makes it easy to perform tasks such as object detection, semantic segmentation, and pose estimation.
In this article, we’ll demonstrate how to use YoloV11 for object detection to apply a face mosaic effect to a video. This is designed as a beginner-friendly tutorial to help you get started with YoloV11 for object detection.
Note: This article does not cover model training.
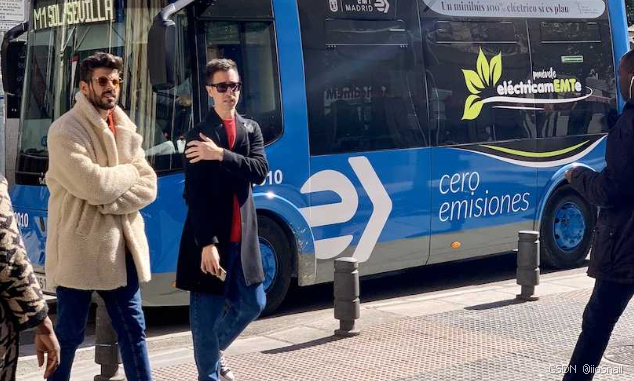
Adding Mosaic to Faces in Images
Before diving into video processing, let’s begin with processing static images. This will help you familiarize yourself with the Yolo API.
First, install the official Yolo dependency: ultralytics. This library provides a simple interface for model training, inference, and more, making it easy to work with Yolo.
```python
!pip install ultralytics
```
Next, import the libraries you’ll need:
```python
import cv2  # For image processing
from ultralytics import YOLO  # For accessing the YOLO model
```
Next, let's load the Yolo Model. Here, we use a Yolo model trained specifically for face detection from the yolov8-face project. You’ll need to download the yolov8n-face.pt model first and place it in your working directory.
```python
model = YOLO("yolov8n-face.pt")
```
Let’s download a sample test image for face detection:
```python
!wget https://ultralytics.com/images/bus.jpg
```
After downloading it, read the image using OpenCV and display it:
```python
image = cv2.imread("bus.jpg")
cv2.imshow(image)
```

After obtaining the image, we can perform inference using the loaded YOLO model as follows:
```python
# YOLO can process multiple images at once, so the results are returned as a list.
results = model(image)
```
For an object detection task, the detection results are stored in the boxes attribute of results:
```python
results[0].boxes   # Since we only process one image, we use results[0].
```
The output would look like this:
```
ultralytics.engine.results.Boxes object with attributes:

# Since two faces are detected, all the data below contains two entries.
cls: tensor([0., 0.])  # Object class. Since this is a face detection model, there is only one class: face (0).
conf: tensor([0.7887, 0.7506])  # Confidence scores (0~1)
...
xyxy: tensor([[114., 417., 154., 467.],
        [270., 421., 307., 470.]])  # Bounding box coordinates of the detected faces.
...
```
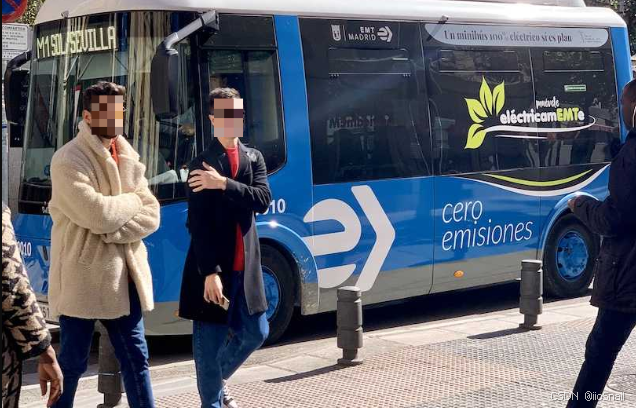
With the bounding box coordinates for the detected faces, we can apply a mosaic effect to the face regions. The following code demonstrates how to achieve this:
```python
mosaic_scale = 10  # Define the level of mosaic blur. Larger values result in a stronger blur.

boxes = results[0].boxes.xyxy
for i in range(len(boxes)):  # Iterate through all detected faces
    x1, y1, x2, y2 = boxes[i].int()
    # Extract the region of interest (ROI), i.e., the face area
    # For example, if the face size is 49x37, the ROI shape will be (49, 37, 3)
    roi = image[y1:y2, x1:x2]

    # Get the height and width of the face region
    h, w = roi.shape[:2]
    # Downscale the face region by a factor of {mosaic_scale}, e.g., 10x smaller
    small_roi = cv2.resize(roi, (w // mosaic_scale, h // mosaic_scale), interpolation=cv2.INTER_LINEAR)
    # Upscale the downscaled face back to its original size, creating the mosaic effect
    mosaic_roi = cv2.resize(small_roi, (w, h), interpolation=cv2.INTER_NEAREST)
    # Replace the original face in the image with the mosaic face
    image[y1:y2, x1:x2] = mosaic_roi

```
After processing the image and applying the mosaic effect to the detected faces, let's display the final result using OpenCV:
```python
cv2.imshow(image)
```

Apply Mosaic to Faces in Video
Apply mosaic to faces in a video involves processing each frame individually, applying a mosaic effect, and then reassembling the video. The process can be broken down into the following steps:
- Extract the audio from the video using
ffmpeg. - Read video frames one by one and apply a mosaic effect to faces.
- Combine the processed frames back into a video (At the time, the video is silent).
- Merge the extracted audio with the silent video to produce the final output.
Let’s proceed with a code demonstration.
We start by importing the necessary libraries:
```python
import ffmpeg # Requires ffmpeg-python to be installed
import cv2
from numpy import ndarray
from ultralytics import YOLO
from tqdm import tqdm
```
Next, we encapsulate the logic for applying a mosaic effect to an image into a reusable function. This will allow us to blur faces in video frames efficiently.
```python
def mosaic_image(model, image:ndarray, mosaic_scale = 10) -> ndarray:
    results = model(image, verbose=False)
    results[0].boxes

    boxes = results[0].boxes.xyxy
    for i in range(len(boxes)):
        x1, y1, x2, y2 = boxes[i].int()
        roi = image[y1:y2, x1:x2]

        h, w = roi.shape[:2]
        small_roi = cv2.resize(roi, (w // mosaic_scale, h // mosaic_scale), interpolation=cv2.INTER_LINEAR)
        mosaic_roi = cv2.resize(small_roi, (w, h), interpolation=cv2.INTER_NEAREST)
        image[y1:y2, x1:x2] = mosaic_roi

    return image
```
Now that we have the mosaic function ready, we can move on to processing the video.
First, we should define paths for the input video, output video, and intermediate files. Also, load the YOLO model for face detection.
```python
# You can download the video from the link:
# https://github.com/iioSnail/pytorch_deep_learning_examples/tree/main/asserts/mp4
input_video = "kunkun.mp4"
tmp_audio = "tmp.wav"
tmp_video = "tmp_kunkun.mp4"
output_video = "mosaic_kunkun.mp4"

model = YOLO("yolov8n-face.pt")
```
Next, use ffmpeg to extract the audio from the original video.
```python
ffmpeg.input(input_video).output(tmp_audio, format='wav').run(overwrite_output=True)
```
The following Python code demonstrates how to process a video frame-by-frame, apply an effect (like a mosaic), and save it as a new video.
```python
# Open the input video file
cap = cv2.VideoCapture(input_video)
if not cap.isOpened():
    print("Error: Could not open video file.")
    exit(0)

# Retrieve video properties: width, height, frame rate, and total frame count
width = int(cap.get(cv2.CAP_PROP_FRAME_WIDTH))
height = int(cap.get(cv2.CAP_PROP_FRAME_HEIGHT))
fps = cap.get(cv2.CAP_PROP_FPS)
# Total number of frames
n_frames = int(cap.get(cv2.CAP_PROP_FRAME_COUNT))

# Configure the video writer for saving the processed frames
fourcc = cv2.VideoWriter_fourcc(*'mp4v')
out = cv2.VideoWriter(tmp_video, fourcc, fps, (width, height))

# Initialize a progress bar
pro_bar = tqdm(total=n_frames)

# Process the video frame-by-frame
while True:
    # Read the current frame
    # ret: True if a frame is read successfully, False otherwise.
    ret, frame = cap.read()

    if not ret:  # If no more frames, exit the loop
        break

    # Apply mosaic processing to the current frame
    frame = mosaic_image(model, frame)
    # Write the processed frame to the output video
    out.write(frame)

    # Update the progress bar
    pro_bar.update(1)

# Release resources
cap.release()
out.release()
pro_bar.close()
```
After processing the frames, the resulting video is silent. To add back the original audio, the following code uses the ffmpeg library to merge the audio file with the newly created video:
```python
video_stream = ffmpeg.input(tmp_video)
audio_stream = ffmpeg.input(tmp_audio)
ffmpeg.output(video_stream, audio_stream, output_video, vcodec="copy", acodec='aac').run(overwrite_output=True)
```
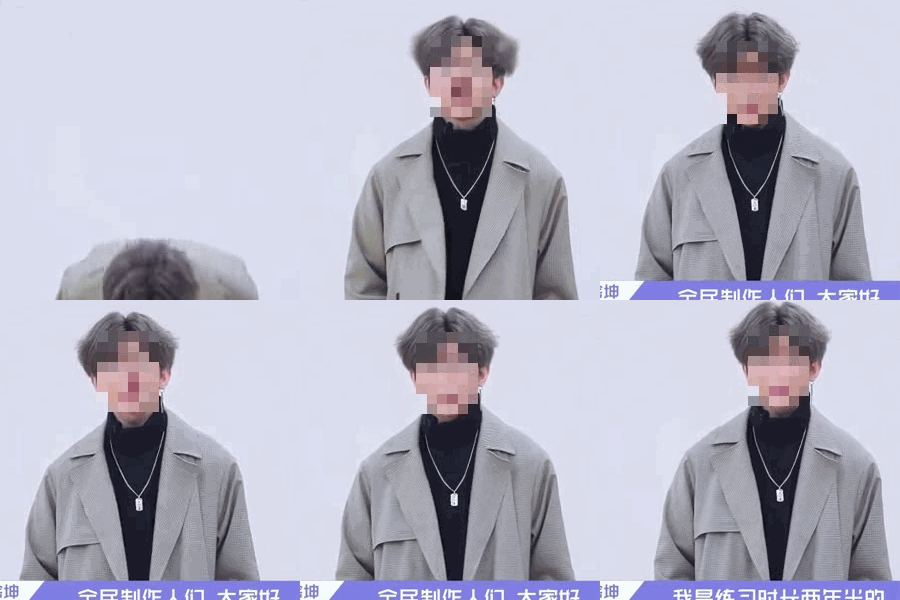
Final result:


