Pytorch入门实战(6):基于GAN生成简单的动漫人物头像
代码地址: https://github.com/iioSnail/pytorch_deep_learning_examples
本文涉及知识点
- GAN网络基础知识,可参考我的学习笔记或观看李宏毅老师课程
- Pytorch中DataLoader和Dataset的基本用法
- 反卷积通俗详细解析与nn.ConvTranspose2d重要参数解释
- TensorBoard快速入门(Pytorch使用TensorBoard)
本文内容
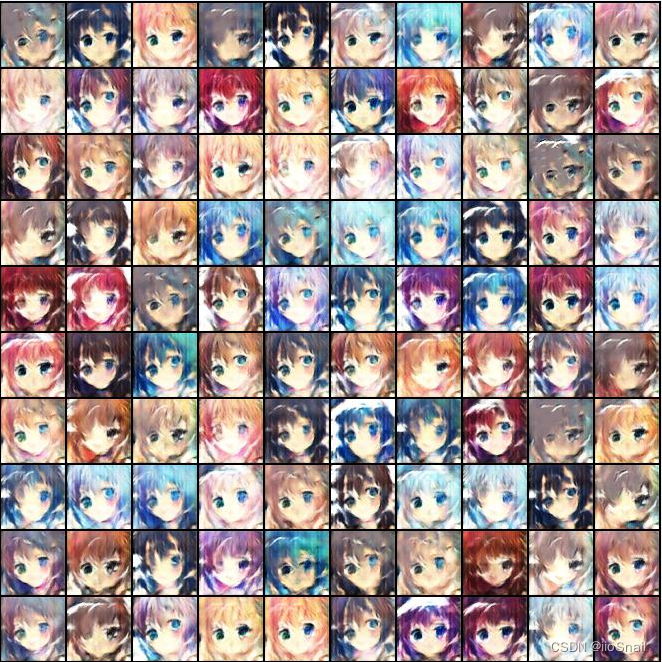
本文参考李彦宏老师2021年度的GAN作业06,训练一个生成动漫人物头像的GAN网络。本篇是入门篇,所以使用最简单的GAN网络,所以生成的动漫人物头像也较为模糊。最终效果为(我这边只训练了40个epoch):

全局参数
首先导入需要用到的包:
```python
import os
import sys

import torch
import torch.nn as nn
import torchvision
import torchvision.transforms as transforms
from torch.autograd import Variable
from torch.utils.data import Dataset, DataLoader
import matplotlib.pyplot as plt
from tqdm import tqdm
from torch.utils.tensorboard import SummaryWriter
```
设置一些全局参数:
```python
batch_size = 64
num_workers = 2
n_epoch = 100
z_dim = 100 # 噪音向量的维度
learning_rate = 3e-4
device = 'cuda' if torch.cuda.is_available() else 'cpu'

# 模型的保存路径,在Google Colab中,若挂在了Google Drive,则模型会被保存到Google Drive上
ckpt_dir = 'drive/MyDrive/models'
faces_path = "faces"  # 数据集所在的目录

print("Device: ", device) # 打印一下设备,防止训练半天发现是在CPU上做的
```
Device: cuda
数据集
数据集是若干动漫人物头像,下载链接地址如下:
```
https://pan.baidu.com/s/1zsJJJapFLr1zWWhgGol-aA 提取码:2k4z
```
下载好之后,将其解压到当前目录下,最终为:
```
faces/
├── 1.jpg
├── 2.jpg
├── 3.jpg
...
```
工具函数
这里定义一个用于清理输出的工具类,用于训练过程中清理输出,要不然太多了。
```python
def clear_output():
    """
    清理Jupyter Notebook中的输出
    """
    os.system('cls' if os.name == 'nt' else 'clear')
    if 'ipykernel' in sys.modules:
        from IPython.display import clear_output as clear
        clear()
```
数据预处理
定义Dataset, 我这里将头像图片缩放到64x64的大小,并对其进行了标准化:
```python
class CrypkoDataset(Dataset):
    def __init__(self, img_path='./faces'):
        self.fnames = [img_path + '/' + img for img in os.listdir(img_path)]

        self.transform = transforms.Compose([
            transforms.ToPILImage(),
            transforms.Resize((64, 64)),
            transforms.ToTensor(),
            # 这里将图片缩放到了均值为0.5,方差为0.5的区间,本质是执行了 (x-0.5)/0.5
            # 详情可参考:https://blog.csdn.net/zhaohongfei_358/article/details/117910661
            transforms.Normalize(mean=(0.5, 0.5, 0.5), std=(0.5, 0.5, 0.5)),
        ])

        self.num_samples = len(self.fnames)


    def __getitem__(self, idx):
        fname = self.fnames[idx]
        img = torchvision.io.read_image(fname)
        img = self.transform(img)
        return img


    def __len__(self):
        return self.num_samples
```
```python
dataset = CrypkoDataset(faces_path)
dataloader = DataLoader(dataset, batch_size=batch_size, shuffle=True, num_workers=num_workers)
```
这里简单测试下各个方法:
```python
dataset.__getitem__(0).size(), len(dataset)
```
(torch.Size([3, 64, 64]), 71314)
可以看到,我们将图片成功缩放到64x64大小,一共有71314张图片。
接下来展示几个图片,看看效果:
```python
images = [(dataset[i] + 1) / 2 for i in range(16)]  # 拿出16张图片
grid_img = torchvision.utils.make_grid(images, nrow=4)  # 将其组合成一个4x4的网格
plt.figure(figsize=(6, 6))
plt.imshow(grid_img.permute(1, 2, 0)) # plt接收的图片通道要在最后,所以permute一下
plt.show()
```
![[外链图片转存失败,源站可能有防盗链机制,建议将图片保存下来直接上传(img-yPBS5ioo-1657252017524)(output_19_0.png)]](https://raw.githubusercontent.com/iioSnail/blogger_res/main/img/7c41bba9c9e55f04a44deabc07fd29f2.png)
关于 (dataset[i] + 1) / 2 的简单解释:由于上面执行了标准化,即 y=(x-0.5)/0.5,所以这里要将其变回x,所以执行了 x=0.5y+0.5=(y+1)/2
定义模型
数据集准备完毕后,开始定义我们的模型,GAN需要定义Generator和Discriminator,Generator用于生成图片,Discriminator用来鉴别图片是生成的还是真实的,本文使用DCGAN(Deep Convolutional GAN)。
Generator
```python
class Generator(nn.Module):
    """
    输入Shape为(N, in_dim),N为batch_size, in_dim是随机向量的维度
    输出Shape为(N, 3, 64, 64),即生成N张64x64的彩色图像
    """

    def __init__(self, in_dim, dim=64):
        super(Generator, self).__init__()

        def dconv_bn_relu(in_dim, out_dim):
            return nn.Sequential(
                nn.ConvTranspose2d(in_dim, out_dim, 5, 2,
                                   padding=2, output_padding=1, bias=False),
                nn.BatchNorm2d(out_dim),
                nn.ReLU()
            )

        # 1. 先用线性层将随机向量变成 dim*8 个通道,大小为4x4的图片
        self.l1 = nn.Sequential(
            nn.Linear(in_dim, dim * 8 * 4 * 4, bias=False),
            nn.BatchNorm1d(dim * 8 * 4 * 4),
            nn.ReLU()
        )

        # 2. 然后就一直反卷积,不断的将图片变大,同时通道不断减小,最终变成一个3通道,64x64大小的图片
        self.l2_5 = nn.Sequential(
            dconv_bn_relu(dim * 8, dim * 4),
            dconv_bn_relu(dim * 4, dim * 2),
            dconv_bn_relu(dim * 2, dim),
            nn.ConvTranspose2d(dim, 3, 5, 2, padding=2, output_padding=1),
            nn.Tanh()
        )

    def forward(self, x):
        y = self.l1(x)
        y = y.view(y.size(0), -1, 4, 4)
        y = self.l2_5(y)
        return y
```
Discriminator
```python
class Discriminator(nn.Module):
    """
    输入Shape为(N, 3, 64, 64),即N张64x64的彩色图片
    输出Shape为(N,), 即这N个图片每张图片的真实率,越接近1表示Discriminator越觉得它是真的
    """

    def __init__(self, in_dim=3, dim=64): # 注意这里的in_dim是指的图片的通道数,所以是3
        super(Discriminator, self).__init__()

        def conv_bn_lrelu(in_dim, out_dim):
            return nn.Sequential(
                nn.Conv2d(in_dim, out_dim, 5, 2, 2),
                nn.BatchNorm2d(out_dim),
                nn.LeakyReLU(0.2),
            )

        # 就是一堆卷积一直卷,把原始的图片最终卷成一个数字
        self.ls = nn.Sequential(
            nn.Conv2d(in_dim, dim, 5, 2, 2),
            nn.LeakyReLU(0.2),
            conv_bn_lrelu(dim, dim * 2),
            conv_bn_lrelu(dim * 2, dim * 4),
            conv_bn_lrelu(dim * 4, dim * 8),
            nn.Conv2d(dim * 8, 1, 4),
            nn.Sigmoid(),
        )

    def forward(self, x):
        y = self.ls(x)
        y = y.view(-1)
        return y
```
```python
G = Generator(in_dim=z_dim)
D = Discriminator()
G = G.to(device)
D = D.to(device)
```
由于Discriminator做的是二分类问题,所以这里使用Binary Cross Entropy
```python
criterion = nn.BCELoss()
```
```python
opt_D = torch.optim.Adam(D.parameters(), lr=learning_rate)
opt_G = torch.optim.Adam(G.parameters(), lr=learning_rate)
```
训练模型
这里使用tensorboard记录loss变化和生成的图片:
```python
writer = SummaryWriter()
```
然后就可以启动tensorboard了:
```shell
tensorboard --logdir runs
```
开始训练:
```python
steps = 0
log_after_step = 50 # 多少步记录一次Loss

# 用于评估阶段的z向量
z_sample = Variable(torch.randn(100, z_dim)).to(device)

for e, epoch in enumerate(range(n_epoch)):
    total_loss_D = 0
    total_loss_G = 0

    for i, data in enumerate(tqdm(dataloader, desc='Epoch {}: '.format(e))):
        imgs = data
        imgs = imgs.to(device)

        # 重新获取batch_size,因为到最后一组的时候,可能凑不够
        batch_size = imgs.size(0)

        # ============================================
        #  训练Discriminator
        # ============================================
        # 1. 得到一批随机的噪音向量 z
        z = Variable(torch.randn(batch_size, z_dim)).to(device)
        # 2. 得到真实(real)的图片
        r_imgs = Variable(imgs).to(device)
        # 3. 使用 Generator生成一批假(fake)图片
        f_imgs = G(z)

        # 构建标签,真实图片的标签都为1,假图片的标签都为0
        r_label = torch.ones((batch_size, )).to(device)
        f_label = torch.zeros((batch_size, )).to(device)

        # 用Discriminator对真实图片和假图片进行判别
        r_logit = D(r_imgs.detach())
        f_logit = D(f_imgs.detach())

        # 计算Discriminator的损失
        r_loss = criterion(r_logit, r_label)
        f_loss = criterion(f_logit, f_label)
        loss_D = (r_loss + f_loss) / 2
        total_loss_D += loss_D

        # 对Discriminator进行反向传播
        D.zero_grad()
        loss_D.backward()
        opt_D.step()

        # ============================================
        # 训练Generator
        # ============================================
        # 1. 生成N张假图片
        z = Variable(torch.randn(batch_size, z_dim)).to(device)
        f_imgs = G(z)

        # 2. 让Discriminator判别这些假图片
        f_logit = D(f_imgs)

        # 3. 计算损失,这里Generator是希望图片越真越好,所以参数是f_logit和r_label
        loss_G = criterion(f_logit, r_label)
        total_loss_G += loss_G

        # 对Generator进行反向传播
        G.zero_grad()
        loss_G.backward()
        opt_G.step()

        steps += 1

        if steps % log_after_step == 0:
            writer.add_scalars("loss", {
                "Loss_D": total_loss_D / log_after_step,
                "Loss_G": total_loss_G / log_after_step
            }, global_step=steps)

    # 清理之前的输出
    clear_output()

    # 每一个epoch后,生成一张一组图片看看效果
    G.eval()

    # 用Generator生成图片,并进行去除标准化,然后保存到logs目录下
    f_imgs_sample = (G(z_sample).data + 1) / 2.0
    if not os.path.exists('logs'):
        os.makedirs('logs')
    filename = os.path.join('logs', f'Epoch_{epoch + 1:03d}.jpg')
    # 将生成的图片保存下来
    torchvision.utils.save_image(f_imgs_sample, filename, nrow=10)
    print(f' | Save some samples to {filename}.')

    # 展示一下生成的图片
    grid_img = torchvision.utils.make_grid(f_imgs_sample.cpu(), nrow=10)
    plt.figure(figsize=(10, 10))
    plt.imshow(grid_img.permute(1, 2, 0))
    plt.show()

    # Tensorboard记录一下生成的图片
    writer.add_image("Generated_Images", grid_img, global_step=steps)

    # 将Generator重新调整为训练模式
    G.train()

    if not os.path.exists(ckpt_dir):
        os.makedirs(ckpt_dir)
    # 每5个epoch保存一次模型
    if (e + 1) % 5 == 0 or e == 0:
        # Save the checkpoints.
        torch.save(G.state_dict(), os.path.join(ckpt_dir, 'G_{}.pth'.format(steps)))
        torch.save(D.state_dict(), os.path.join(ckpt_dir, 'D_{}.pth'.format(steps)))
```

这是第40个epoch后的输出,我在之后就停止了。
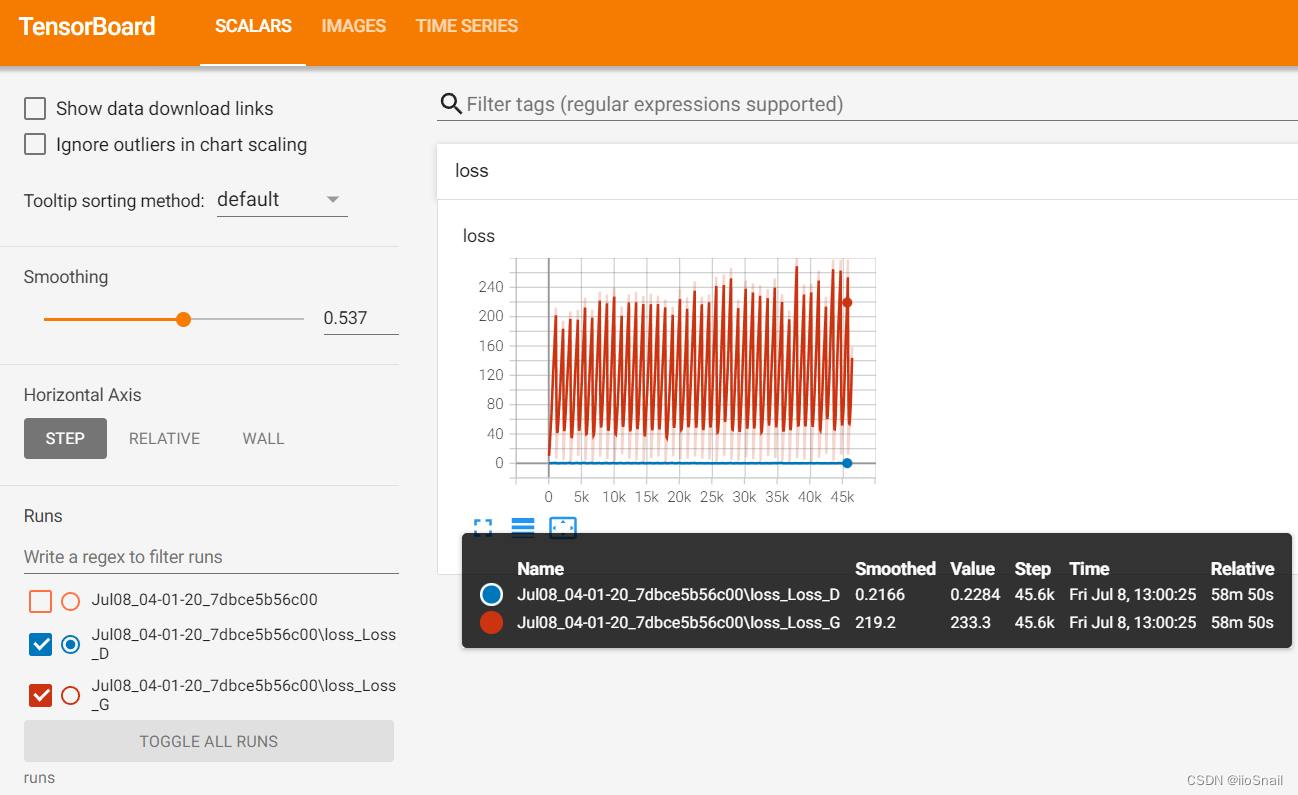
我们来观察下Tensorboard面板:

红色为Generator的损失,蓝色为Discriminator的损失,从这张图我们可以看到两个现象:
- Discriminator的损失明显小于Generator:这是GAN常见的一个问题,原因是Discriminator的任务比Generator简单的多,毕竟学会分辨真假画可比学会画画简单多了。这样就会导致Discriminator能给Generator提供的信息太少,进而导致Generator无法收敛
- Generator的损失不断的震荡(其实Discriminator也在震荡):其实震荡才是正常的,因为Generator的损失是“是否能骗过Discriminator”,第一次他没骗过(损失高),然后G进化了,就能骗过了(损失低),然后Discrimnator也进化了,然后G又骗不过了(损失高),然后就这样依次反复。 Discriminator同理。反过来,如果Generator的损失不断下降,那么就要考虑是不是Generator太容易骗过Discriminator了,然后想着优化Discriminator。
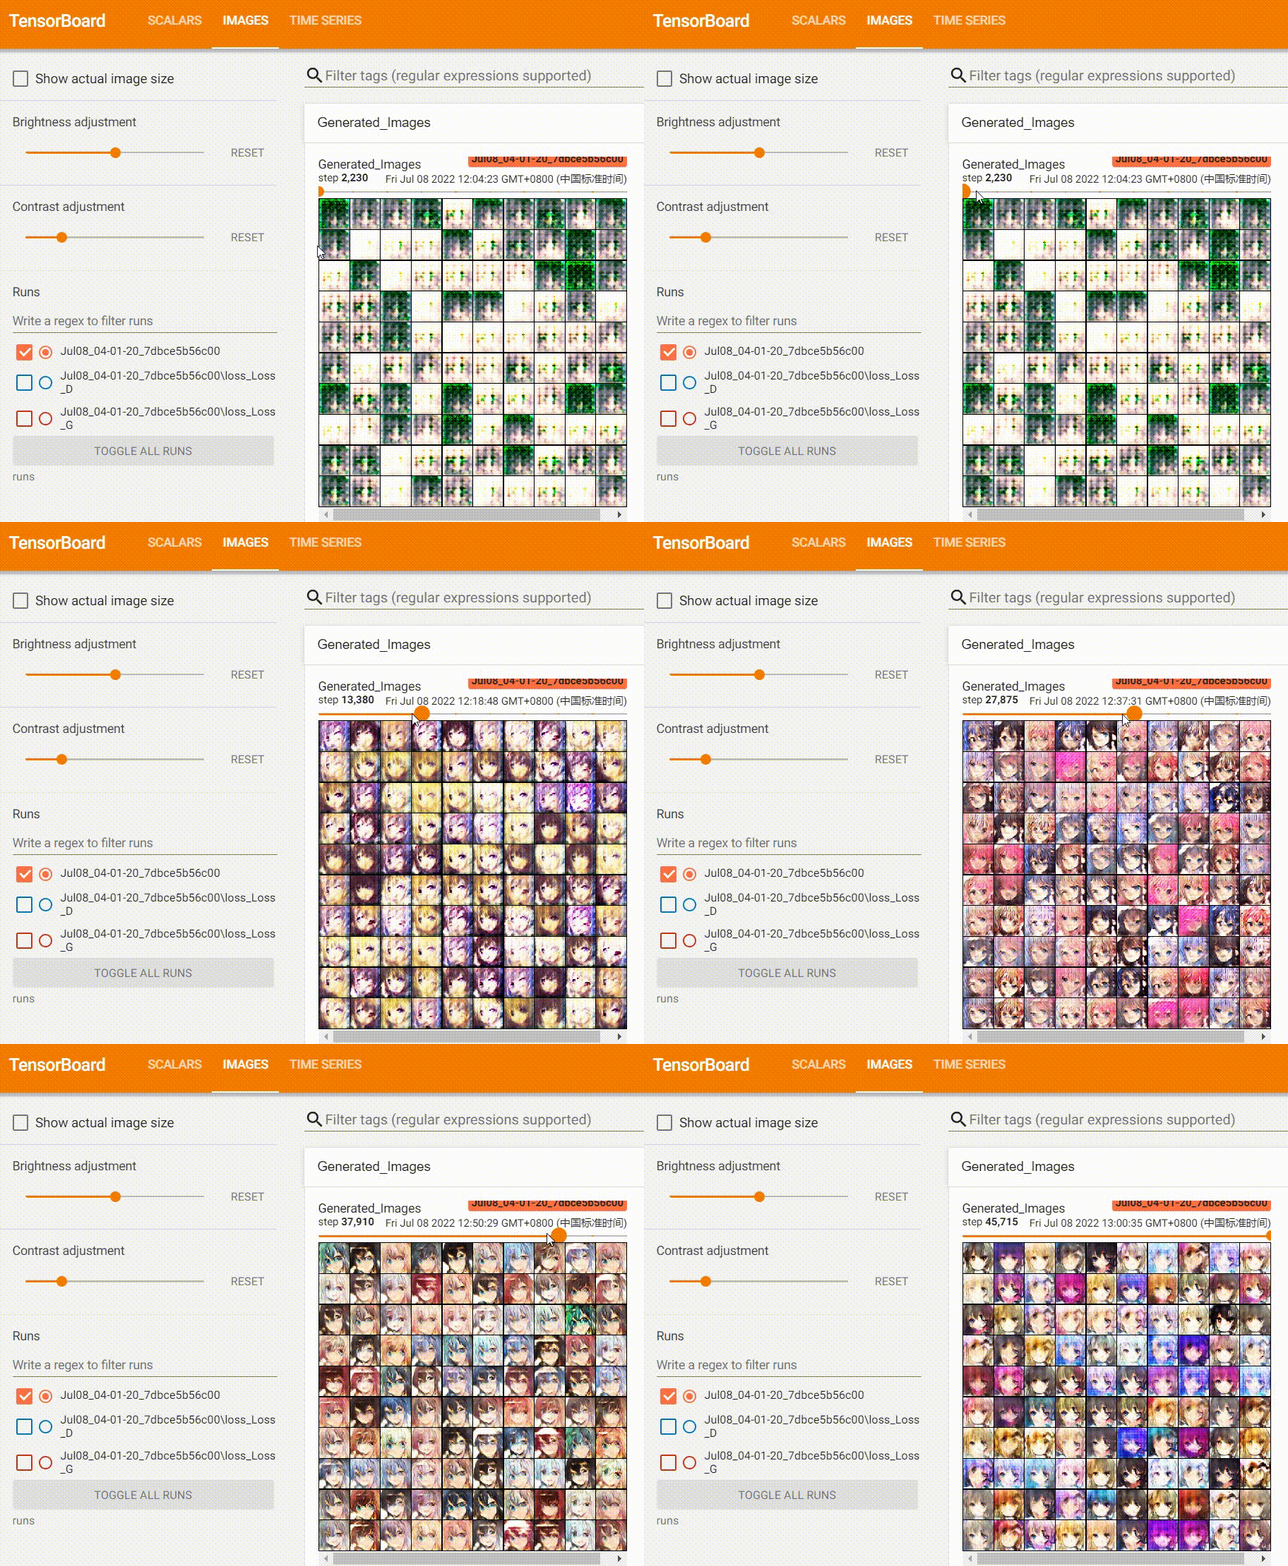
我在训练过程也记录了图片的变化:

可以看到,Generator生成的图片质量越来越好
模型使用
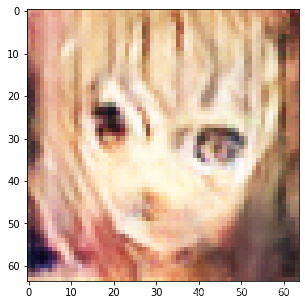
训练完成后,我们来尝试使用下模型:
```python
G.eval()
inputs = torch.rand(1, 100).to(device)
outputs = G(inputs)
outputs = (outputs.data + 1) / 2.0
plt.figure(figsize=(5, 5))
plt.imshow(outputs[0].cpu().permute(1, 2, 0))
plt.show()
```

。。。 有点丑,但至少还能看出来是个妹子


